Introducing our limited edition RDY2GO collection. We’re ready are you? Discover more

How to plan a new build garden from scratch

Moving into your new build home means that you are provided with a completely blank canvas that is designed to be personalised just for you. It is the perfect time to start fresh and let your creativity run wild with ideas and designs, including your garden! 

Starting a new garden project from scratch may seem a little intimidating at first, especially if it is your first time designing a garden. Keep on reading to find out more about how efficiently plan and transform your garden space from scratch. 


1 – Consider your garden’s purpose 

The first step to designing your dream garden is to decide what you want to achieve from the space and what you would like to use your garden for the most. You may want your garden to be the perfect place to host and socialise with friends or maybe you would prefer to create a calm and secluded area where you can drink your morning coffee. 

Start by writing down all of the things that you would like to incorporate into your garden such as a patio, a play area for your children, a BBQ area etc. Once you have created this list, it is time to categorise them into three sections - Essential, Important and Desirable. 

Breaking each component down into categories allows you to prioritise which items you should focus on first and build a realistic plan of what will be able to comfortably fit within your garden space whilst still being practical.   

2 – Gather inspiration

It is time to get creative! Gather as much garden inspiration as you can from Pinterest, Instagram, Magazines etc. Try to not think too practically at this stage, if you like the look of something, simply save it. Eventually a clear pattern and aesthetic should become clear which can then pave the way for your design choices further down the line.

Once you have an idea on your garden style and aesthetic, you can start to create mood boards of your ideas. This is a great chance to window shop and collect any ideas that you may have in one cohesive space so that you can refer back to this when planning and purchasing items for your new garden.

3- Create scaled base plan

Once you have an idea of your garden requirements and styles, it is time to start planning the area! The best way to do this is by creating a scaled base plan of your garden, this includes incorporating the back of your house into the plan. 

The first step to creating your base plan is to measure all your fences or walls. Make sure that you keep these measurements as these will be needed later on. It is also important to measure the back of your house including any access points such as patio doors and windows. 

Next, grab some graph paper and start to draw the outline of your garden. We recommend using a scale of 1:50 for most gardens, this means that 2cm on paper is equivalent to 1m in your garden. 

Once this is done, you should be finished with a clear drawing of your back garden which will allow you to experiment and plan your designs accordingly. 

Top Tip: Once you have drawn your garden out, photocopy a few copies to allow you to experiment with ideas without having to worry about ruining your only base plan!

4 -Zoning your garden

The next step to designing your garden is to experiment with marking out where each different zone will go within your space. These zones will be where you place each of your desired areas such as your patio, children’s play area, lawn etc.

At this stage, you don’t have to worry about each zone being the perfect shape. Simply create zones on your plan by circling the area, making sure to consider the size of each circle to represent the size of each area.  

When creating the different zones within your garden, it is important to consider factors such as the natural landscape of your garden or where the sun rises and sets. You wouldn’t want to place a sun lounger in an area that gets shade throughout the whole day for instance. 

Once you have an idea about where each zone within your garden will be placed, it’s time to get adventurous and experiment with fine tuning your design ideas!

5- Designing your garden space

Grab some tracing paper and place it over your base plan and experiment with the shapes and lines of your zones. You don’t have to worry about the detail at this stage, just simply map out a rough idea of what you would like your design to look like. 

There are typically three recommended themes when designing a garden. The first one is by incorporating circles or curved edges, this works well with long and thin gardens. The second is by adding consistent 45 degree angles, this design technique will make your garden appear wider and larger overall. The last and often most popular is by incorporating square and rectangular shapes into your garden to create a modern look and feel. 

Top Tip: If you can’t decide on a theme, try mapping out your design in the styles listed above on separate sheets of tracing paper to see which style suits your space best!

6 – Getting creative with your planting design

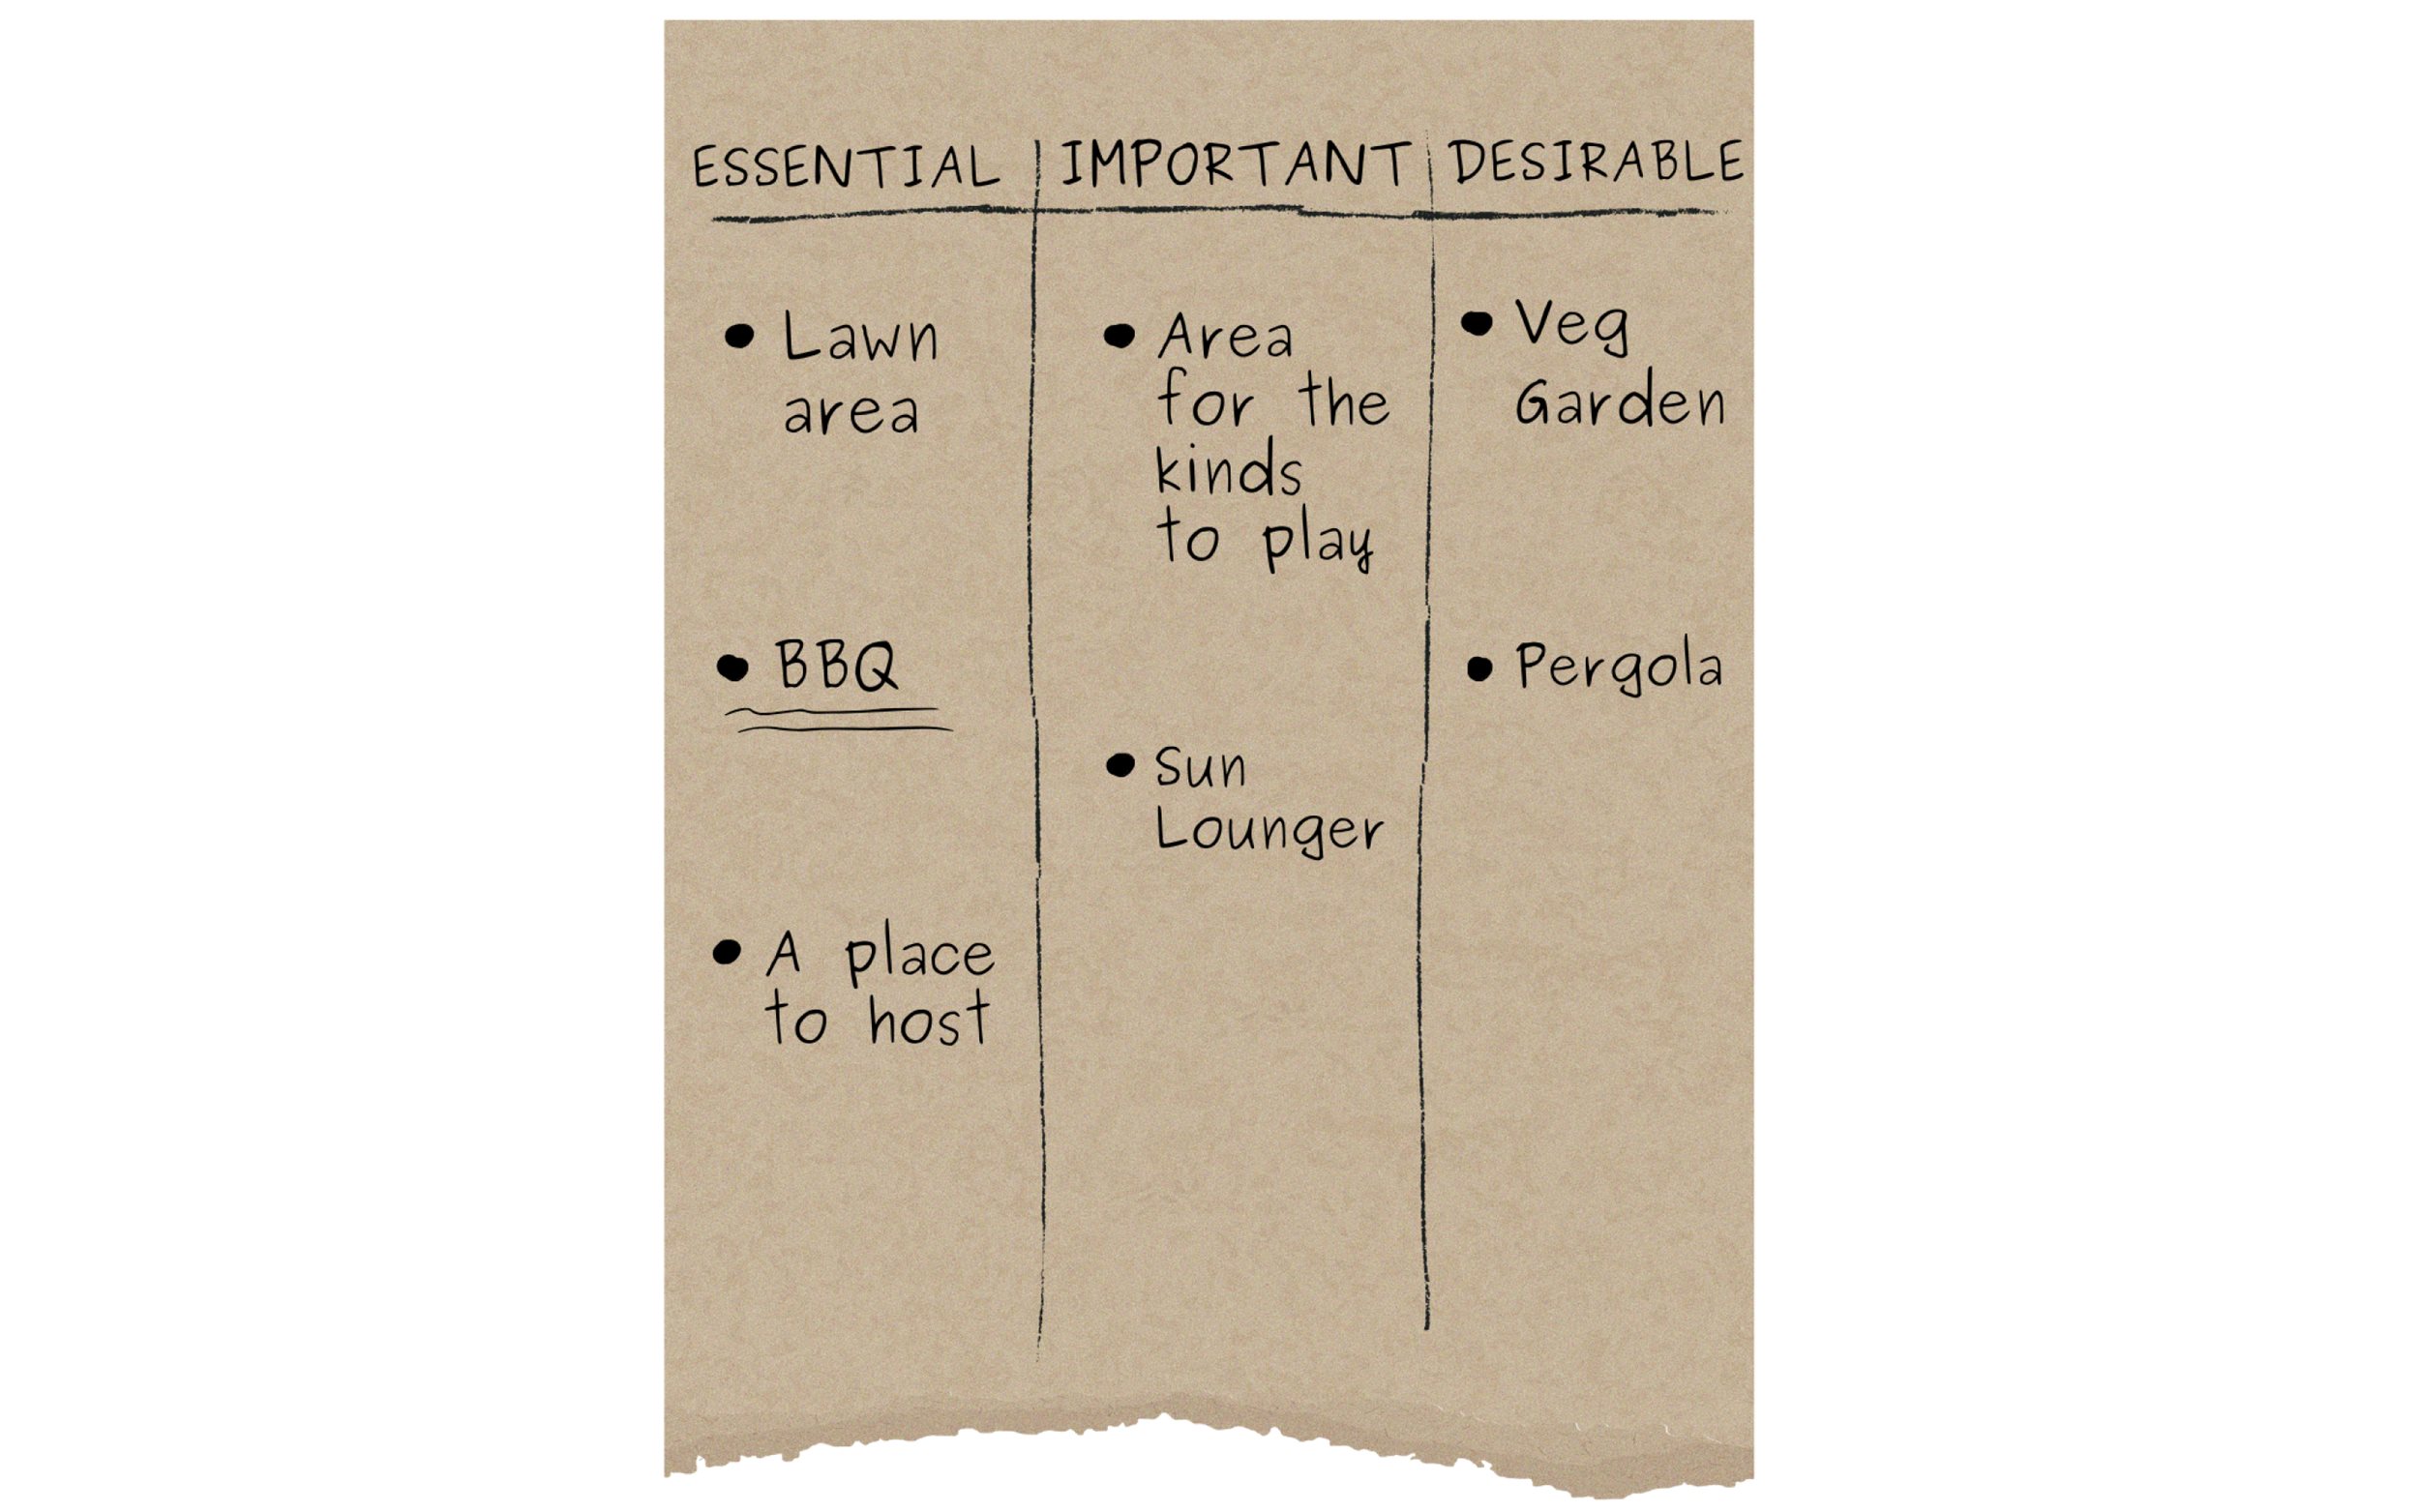
Now that you have decided what you would like to use your garden for, designed where each zone will go and what theme the garden will have, it is time to get into the finer details such as hard landscaping and what you would like to plant in your garden! 

Firstly, start by choosing your hard landscaping. This includes any details such as what material or colour paving slabs are you having? If you have decided on decking, what colour will this be? Wood or composite? Remember, nothing at this stage is permanent, any ideas or tweaks can be made if you change your mind or would like to alter your budget further down the line. 

Now that your hard landscaping plan is finished, it is time to move on to the planting design! Your planting design refers to what flowers, shrubs and bushes you would like to include in your garden. 

We recommend always planning in odd numbers and always planting a minimum of three plants for each species. This allows for your plants to be grouped together without getting lost within the space. 

At this stage, it is also important to consider colour palettes within your garden. You may prefer a colourful and vibrant colour palette with pinks, blues, reds etc or maybe you prefer more of a minimal aesthetic of whites and greens. 

7 – Creating your final garden plan

The last step of your design process is to put all of your hard work into one place, this will be your final garden plan. To do this, gather your initial base plan and draw your desired zone design into this space, including the shape and size of each zone. Within this design, also add in your hard landscaping and where you would like to add certain flowers or shrubs and what colour they will preferably be.

8 – Setting a budget

Now that you have finished your design, it is time to set an overall budget for the total project. If you have a smaller budget, this isn’t anything to worry about. If this is the case, we recommend building your garden in different phases and incorporating your priorities into this so you can decide which area to start working on first. 

Another key thing to consider which will impact your budget is if you would prefer to hire a landscaper to carry out the works or if you are a keen gardener yourself, if you would like to use this as a DIY project opportunity.

Click here to watch our video about designing your garden from scratch.